Using Email Marketing and Forms with our Pop-Ups Pro Widget

Our Pop-Ups Pro widget is a powerful and fully customizable solution for creating pop-up modals on your Muse site. While it’s a fantastic gadget for engaging your site’s visitors, promoting products and sales, and housing a Muse contact form, the options don’t stop there. Pop-Ups Pro is also a great way to gain visibility for third party email marketing platforms and form services.
A question we've seen a lot in support since the release of Pop-Ups Pro is "How do I put [ my favorite email subscribe service ] into a pop-up? Where's the dropdown that lets me pick which service I want to use?" The good news is that you're free to use any service you like, so long as they provide an embed code.
As you may know from previous tutorials, there are tons of third party services that can be used with Muse, such as maps, calendars, and ecommerce solutions. Offering embed code is the simplest way for these services to get their products on your sites; it's literally a matter of copying and pasting. The following three examples of third party integrations use embed code to add email marketing services and form providers to pop-ups with our Pop-Ups Pro widget and the same process described below can be used to integrate dozens of other services. The key is ensuring that the service you're interested in provides embed code – a few don't, but the vast majority do.

Constant Contact Implementation
Before we dive in, it’s important to keep in mind that there are dozens of email subscribe services on the market today. They all range in price based on email list size, styling options, advanced features, and other factors. Most of these platforms, however, include a free version to get you started. Now, let’s begin with Constant Contact, one of the more prominent and industry-leading email marketing platforms available today. Simply visit the Constant Contact website, and create a free account.

You’ll be required to enter some basic information regarding your contact information and your type of organization. However, once completed, you’ll be taken to your dashboard. From there, direct your attention to the header bar, and select the option for "List Growth Tools."

Inside, you’ll see a small handful of pre-made sign-up forms that you can take advantage of, or simply click the yellow prompt for "Create a Sign-Up Form" towards the top-right. From there, you can follow the three-step process of creating, customizing, and styling your form.

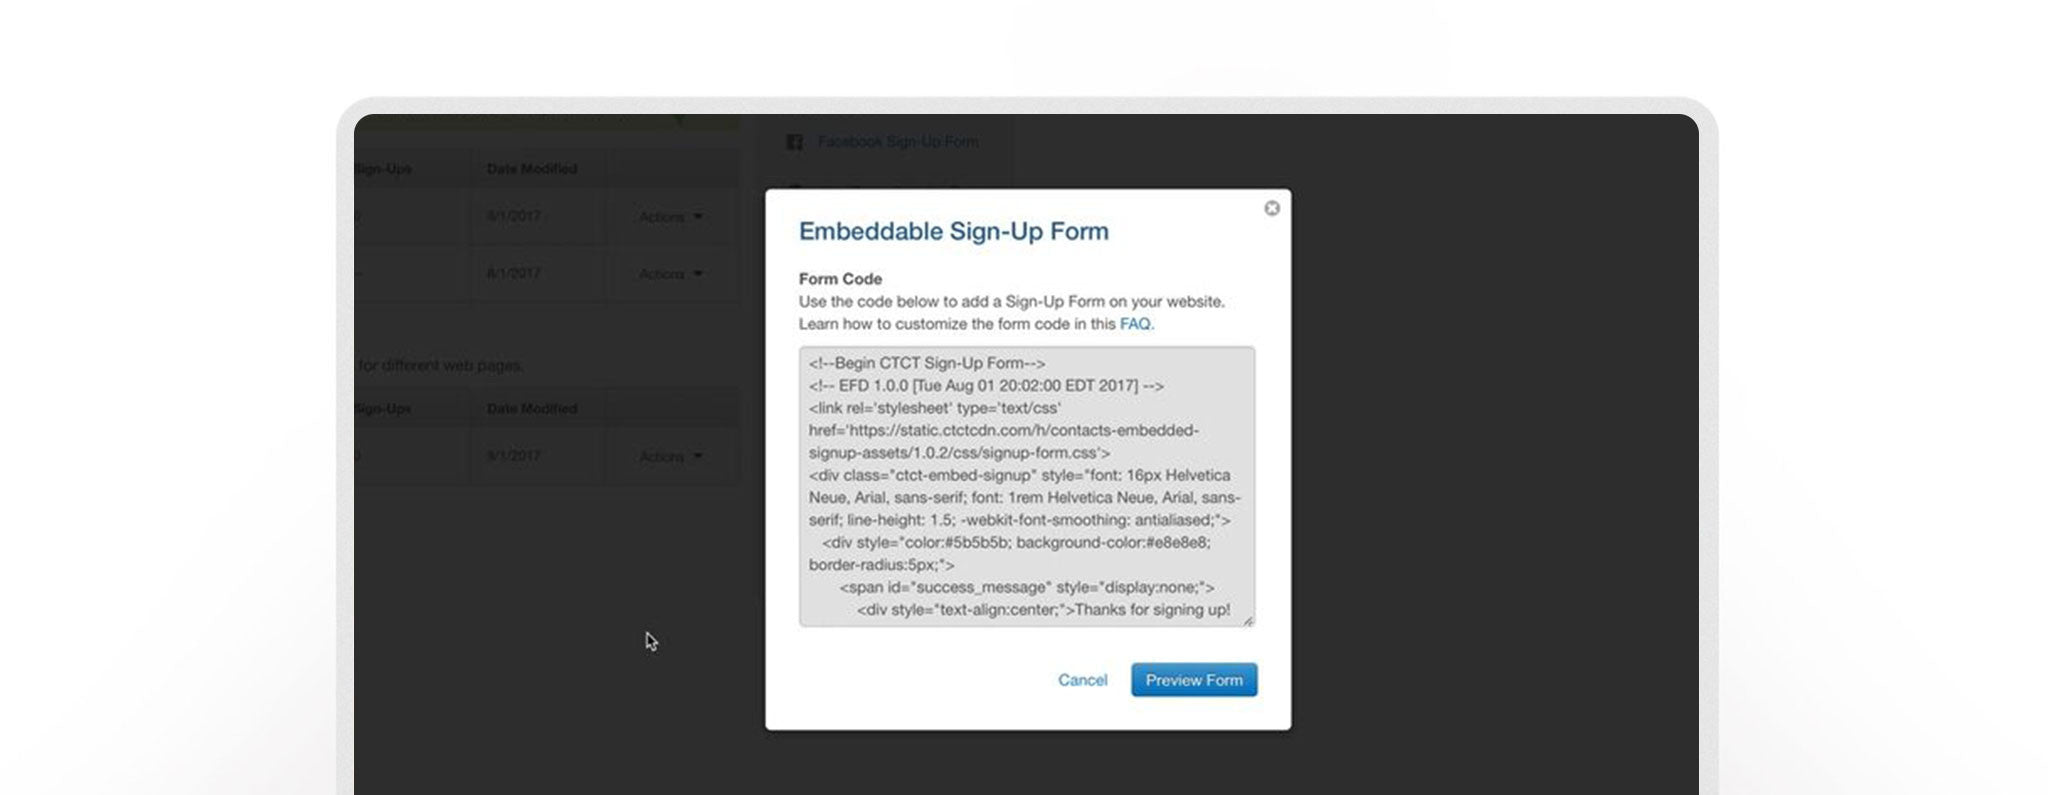
This can consist of just a simple email acquisition, or can involve multiple fields including the user’s name, address, etc. After the third and final phase, you have the option to preview your form, make any last changes if desired, and then lastly, click “Finish.” This will bring you back to your “List Growth Tools” dashboard, where you will now see your new form added under the “Additional Web Sign-Up Forms” list. On the far right column, direct your attention to the “Actions” drop down button, and select the option for “Embed Code.” This will bring up a lightbox pop-up displaying a (likely rather long) embed code; all you need to do is select this, hit Command-C (on Mac) or Control-C (on PC) to copy, and then dive back into Muse!
Now we need to paste our code onto our page. This can be done by either going to “Object” on your top-most menu, and selecting "Insert HTML," or by simply pressing Command-V or Control-V on your keyboard with your Muse page open. Either option will create a new HTML object on your page ready for placement. Assuming you’ve created your pop-up already (using a state button with an assigned graphic style), you’re just moments away from completion.
Our next step is to place our HTML object *inside* our state button, and we do this by clicking and dragging our HTML object, and placing it right over top of the state button. Once you do this, you may notice a slight shift in the state button’s sizing, which is normal. If your state button was sized too small for the placed object, the button will adjust itself automatically.

Now for our final steps, you want to make sure that your HTML object is set to a responsive setting of “None.” As explained in further detail in the Pop-Ups Pro tutorial video, it’s important to keep every aspect of your pop-up a fixed-width. Because of the nature of modals, and how they’re typically only shown temporarily, you don’t need them fluidly adjusting, and they will function much more consistently without this. You can, of course, resize them appropriately for each breakpoint, which will give you all the responsive behavior you should ever need for this type of item.
Finally, size up and customize your state button to house the HTML object in an aesthetically pleasing manner, and you, my friend, are ready for a browser preview.

MailChimp Implementation
Now let’s take a closer look at another industry leader in email marketing tools. Even with a similar functionality and end result, you’ll find all of these platforms to be quite unique in their setup process, contact form styling options, and as mentioned before, pricing. But as with Constant Contact, MailChimp has a free and easily accessible account that you can begin with just a few bits of information. Once inside, you’ll again be taken to a dashboard, however this time, direct your attention to your header menu, and select the option for “Lists.” From there, you’ll likely see a default "list" already generated inside your account, but as you explore the features and grow your contact database, it’s recommended that you explore all the organizational features and widespread communication that MailChimp, along with every provider, offers you.
On the far-right side of your desired list, click the drop down arrow next to the “Stats” button, and select the option for “Signup Forms.” On the following screen, select the second option for “Embedded Forms.” Next, you’ll land on a page with a variety of forms to choose from, such as “Classic,” “Super Slim,” and even an “Advanced” area for those of you that are CSS-savvy.

A simple selection and some basic customization will automatically generate your much desired HTML embed code right there on the screen. Simply copy and paste, and implement into your pop-up just like before.

Wufoo Integration
Now let’s explore an option that’s less intended for network engagement, and more for information acquisition. Wufoo forms allow you to create forms from scratch, field-by-field, and can serve as a simple contact message sender, all the way to fully fleshed-out job application forms. Once you create your account and login to your dashboard, click on the green “New Form” prompt to get started.
You’ll land on a pretty in-depth (but equally awesome) building portal where you can add fields one-by-one, assign themes, custom text, and much more.

Once ready, you can click the “Save Form” prompt at the bottom of your screen, and then select “Share This Form” on the resulting lightbox popup. You’ll then be taken to your embed code front and center; you can copy and implement this into your pop-up as done before.

Thanks again as always, and we definitely encourage you to explore and experiment with the variety of platforms that are out there, and hopefully you’ll discover new possibilities with Pop-Ups Pro along the way. For any questions, comments, or super cool discoveries, hit us up at support@musethemes.com. Thanks!

Comments

Awesome widget. Could do with a little guidance when using Mail Chimp regarding the largest breakpoint. – Thanks
Thank you for showing us how to do this. This helped a lot!!