Muse 8 Released - Our Top 8 Favorite New Features!
Big news - Adobe has released the new version of Muse, known as CC 2014 (version 8).
The entire application has been rebuilt from the ground up, and it’s packed full of exciting new features and enhancements. This was a huge undertaking for the Muse product and engineering teams, and we would just like to say... thank you! We really appreciate your efforts to make this an amazing product.
Now to the good part - what’s included in the new version. We’ve put together a list of our 8 favorite new features, as well as short video overviews explaining how they work.
Here’s our list of changes you can’t miss:
- Dark UI
- Retina Display
- 100% Width Slideshows
- “Right Click” Image Replacement
- 64-Bit Architecture
- In Browser Editing Anywhere (no longer requires Business Catalyst)
- Docking Panels / Toolbar
- Style Tagging in Text Panel
Dark Interface (UI)
Find me a designer who doesn't love the dark user interface introduced in the other CC applications. You can’t because those designers do not exist!

Muse is now available in the Dark UI, which matches other products like Photoshop, InDesign, and Illustrator. There's something enjoyable about working in software that looks so cool. I'm a big fan of the Dark UI because it helps the application blend into the background, and allows me to focus on the design being created on my canvas. Colors seem brighter against the darkened interface, and it's much easier on the eyes after a long evening of creative work.
VIDEO OVERVIEW - NEW INTERFACE
Retina Display Support
Muse now supports high-resolution displays (HiDPI), typically found in Apple products. We’ve had the privilege of building several HiDPI websites prior to the release, and I must say this feature is a thing of beauty.
To enable HiDPI support, simply navigate to the Site Properties panel (File > Site Properties) and select “HiDPI” from the display output settings. Muse will now import your assets and graphics at 50% of the size, and display the proper version depending on the resolution of a visitor’s screen.

An important thing to note - you need to make sure to build your graphics much bigger (144dpi). This threw us off at first, because when you import or place a graphic on the canvas it appears at 50% size. You need to make sure that graphic stays at 50% or lower, or Muse won’t be able to generate a high resolution file on publish. We use PSD's to start many of our designs, so we’ve started building them at 144dpi to ensure we have the resolution required for retina output.
VIDEO OVERVIEW - RETINA DISPLAY SUPPORT
Full Width Image Sliders
This is a highly requested feature! The ability to create sliders that span the entire browser width is a huge addition.
Prior to the R8 release, you needed to use a “Full Screen” slideshow to crudely mimic this behavior. Now you can select a regular slideshow widget, and just drag the left / right edges to the boundaries of the canvas. Muse will snap those edges in place and automatically generate a full width slideshow element.
BONUS! There is now a button to quickly toggle 100% width. It’s included in the upper control bar (see image below).
 Click this button to automatically set the element to full width.
VIDEO OVERVIEW - FULL WIDTH SLIDESHOWS
"Right Click" Image Replacement
An easily overlooked and simple feature, the “Replace Image” is a powerful new feature that’s extremely helpful when you’re working with pre-built templates and themes. You can now replace any image on your site by simply right clicking on it, and selecting “Replace Image” from the options menu.

This works really well on MuseThemes prebuilt design widgets such as sliders and image galleries. Just right click any existing image, select “Replace Image,” and navigate to the location of your new image.
VIDEO OVERVIEW - RIGHT CLICK IMAGE REPLACEMENT
64-Bit Application Speed
64-bit processors allow faster processing of data and much larger access to memory. With most computers sold today equipped with 64-bit processors and operating systems (Windows / OS X) we also need applications that are built to take advantage of this architecture. Adobe started releasing most of their apps in 64-bit back in CS5, however up until this point Muse was not built this way (it was built on Adobe AIR).
Rebuilding the application in a native 64-bit format means that you're likely to see huge performance increases. In the Muse world this means faster publish times and outputting of images, better handling of assets with large file sizes, and overall improved application speed.
In-Browser Editing (Anywhere!)
Adobe released In-Browser Editing in the last release of Muse (7), however it was limited to sites hosted with Business Catalyst. With the new CC 2014 release you can now give your clients access to edit written and image content no matter what hosting platform they use.
This means when your clients need basic content management features, you can easily implement it into their existing website without requiring a complicated switch to another hosting provider.
VIDEO OVERVIEW - IN-BROWSER EDITING ANYWHERE
Docking / Moving Panels
Adobe apps typically allow you to dock the panels (always on the right side) and open multiple documents and windows at one time. The Muse panel floated above the app, and often got left behind on other screens if you're working in a multi-display environment. It was very frustrating, and the app itself felt disconnected and fragile.
The native release feels much more like InDesign or Photoshop, where your panels will click together nicely and multiple website pages can be opened at one time. The main toolbar in Muse is now located along the left side of the UI, which is consistent with other Adobe Apps. I'm a big fan of the app "framing" my workspace, and any similarity to flagship apps like Photoshop or Illustrator will be a huge help for users who currently work with CC apps, but are brand new to Muse.
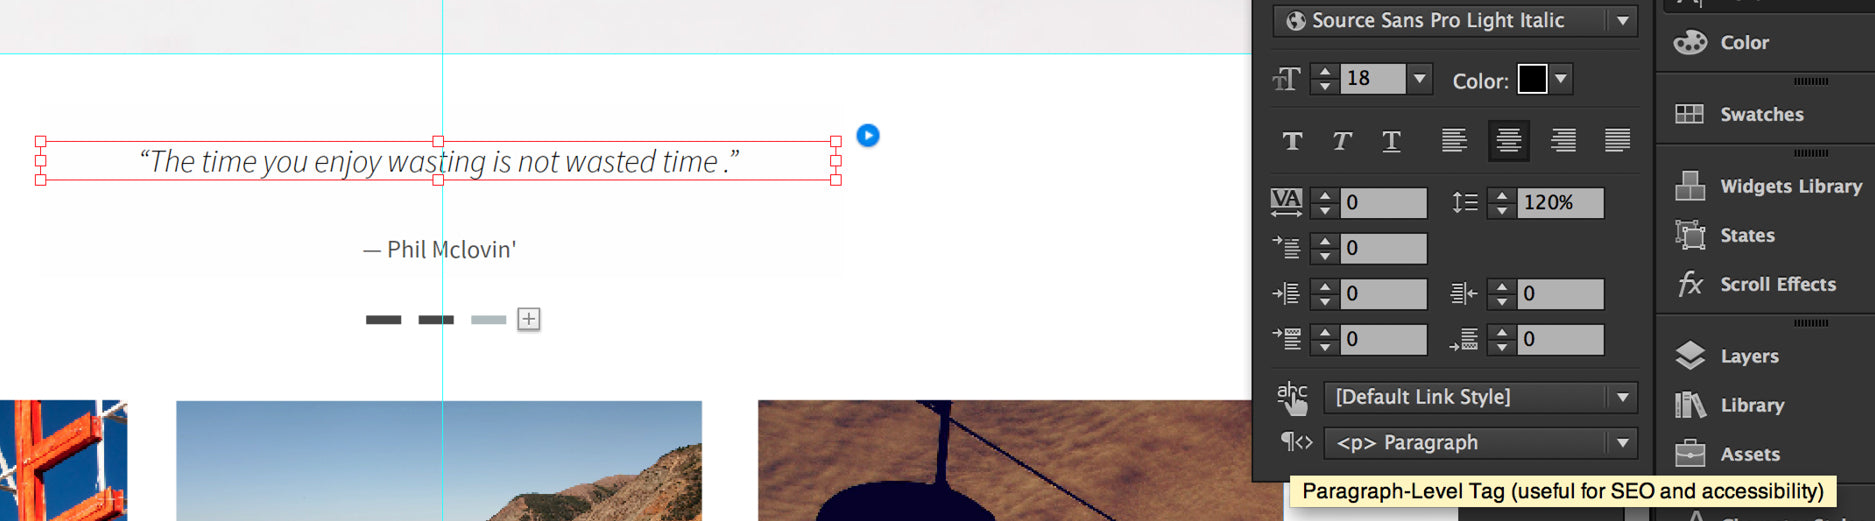
Style Tagging in the Text Panel
Another simple, yet time saving feature, you can now apply style tags (h1, h2, etc.) to text directly from the text options panel. It’s a small change, but applying these text styles is extremely important for your website SEO. Now it’s easy to quickly tell if a block of text is tagged with a style - check out the panel below:
VIDEO OVERVIEW - STYLE TAGGING (TEXT PANEL)
***
Be sure to browse the full CC 2014 release list for the complete breakdown of features and improvements.
Thanks for reading, and have fun working with the new version of Muse!
Cheers,
~ Steve Harris

Wow great tips – I was looking for exactly what you showed here for the new 100% width item that I needed to use for my 404 page – Googled it and bam there you were. Great site. Great freebies, at some point soon I just might purchase your annual membership. Good job.